Showing posts with label valentines. Show all posts

January 19, 2017

A Coloring Valentines card

Last year for Valentine's day, my then Kindergartner made THESE valentines to share with his classmates. I kinda like the idea of a sugar-free valentine, so I kept with that idea again this year. And here you have it, a coloring valentines card for the kids!


I've had these heart crayons pinned on Pinterest for a very long time, and FINALLY decided to give it a go. We have a ton of crayons around our house, all the broken, not sharp crayons that kids run from and never seem to use anymore. I really just needed to dump them, but for some reason, I never can. Now they are being put to use (and whatever is leftover I seriously am going to dump!).


So, first step, take all your crayons, 'shell them', break them up, and melt them. I melted mine at 230 degrees, for 15 minutes. Then let them cool for at least 45-60 minutes.


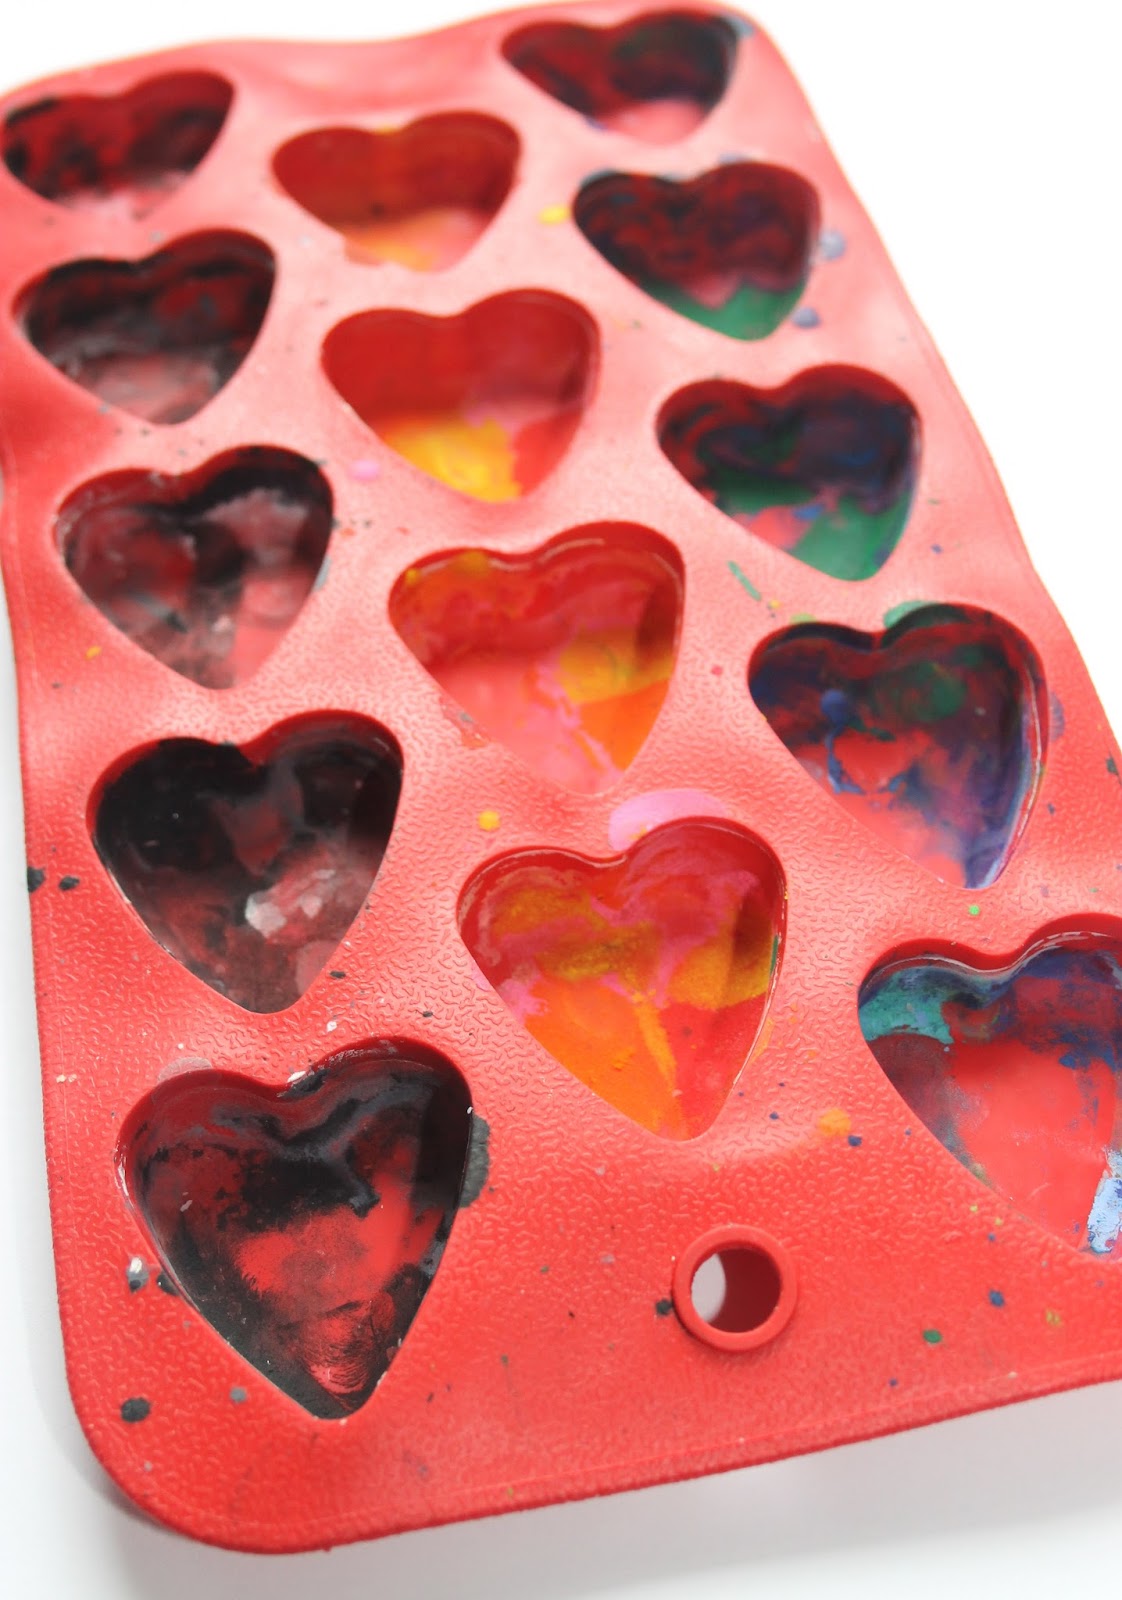
I used a silicone heart mold from the Dollar Tree. Definitely use something cheap and something you wont feel bad about tossing after you're done. The wax pretty much leaves it's mark after you're done. I plan on throwing this one away rather than trying to clean it out (it was only a buck!).


Then I made up these coloring cards. Print page 1, then flip it over and print page 2.


Lastly, have your child fill out the To: and From: on each card and assemble. We used baggies to put ours together, but you could also use a dot of hot glue on the back of each crayon heart and forgo the bag, making these even more super cheap valentines!


An important note I added to the downloadable PDF of these cards...


Now you have downsized your crayon stock, saved a couple bucks, and made a really fun and colorful valentine for the kids!

HAPPY VALENTINES DAY!!

February 1, 2016

High Five Valentine | Sticky Hands!

This year for our kindergartens valentine's gift, we decided to go with a non-candy item. My boy loves toys or any kind, so why not do something he would like (because usually that means at least 50% of the kids in his class would love it too!).

First, I bought some Sticky Hands on Amazon. They came in individual bags, which helped out a lot!


Then I made up THIS valentine card to staple over the bag. Print it, cut them out, then fold each one in half.
Then put the kiddo to work. He had to write the To's: and his name on all of them, then I made him staple them on. For some reason, the stapler is an amazing toy/tool that my kids are always begging to use!


And there you have it! An easy, fairly cheap, and really fun valentine for the kids.


January 25, 2015

Hanging Hearts – Valentines door decor

With Valentines Day just around the corner, I decided to make some hanging hearts for my front door. I’m not a huge fan of wreaths, and only can stand to use them once in a while, so I try to come up with something different for my front door instead.

IMG_20150116_130528

I started with 4 different sizes of hearts – I printed the outline of them from my computer, random sizes, and cut them out by hand. Then I traced them onto some lumber. All of our lumber is hand milled (by my husband Grant), but of course you can just go to the lumber or hardware store and pick up a piece. You don’t need very much for these hearts (depending on their size). I used about 1.5-2’ of lumber.

IMG_3178

After tracing them, CUT. I love, love, love my scroll saw!

IMG_3183

The cut hearts

IMG_3191

And just a picture to show the rough, home milled wood I like to use. Most of the time I’ll plane it before I use it, but I purposefully left it pretty rough, so that when I sanded, after I painted, it would have a worn, rustic look.

IMG_3196

On to painting. Since I cut 4 hearts, I went with 4 different colors. I’m a huge fan of Rustoleum 2x coverage spray paint. The colors I used = Berry pink, Apple red, White, & Grape.

IMG_3205

Sanding comes next. Like I said before, I left my hearts rough so that when I finally sanded them smooth they had a worn, rustic finished look. And I purposefully sanded the edges more than the rest. Next I applied a final coat of clear coat (matte or gloss, it’s up to you. I used matte because I have a bunch of it around).

IMG_3219

You can either stop there & tie a rope/cord around the hearts for a table/shelf display (see picture below), or you can keep going (like I did with my hanging hearts).

IMG_3209

The rest of this project is determined by how & where you want them to hang. I drilled a hole in the hearts (either the top center or off to the top side), a little bigger than the rope I found. I like to keep things sporadic & random, so I couldn’t tell you exactly where I drilled on each heart.

The rope I used was found at a local hardware/ranch store, and it’s almost more of a twine than a rope. It’s about 1/4” thick. I cut two 5’ sections of the twine (from a 40’ roll) and tied them in a “bow” in the middle. I’m not an expert “bow-tier” but I did my best ;)

IMG_3236

Each heart was then tied to one of the dangling pieces of rope/twine, at different heights. I didn’t use any specific knots, just tied it on and made sure it stayed. Actually, I made sure it REALLY stayed by dabbing some E6000 around all the knots, including the big bow (in the back).

IMG_3240

And there you have it. A fun, cute & non-wreath Valentine’s door hanger!

IMG_3237IMG_3239 

diy_with_kiley


FEATURED ON:

Artsy Momma

January 31, 2014

A heart attacked yard {Valentine Peeps® inspired}

IMG_4880The other day I received a fun box full of a variety of Valentine Peeps®.Although this isn’t my first choice in candy, I’m always intrigued when I see Peeps because their products always look so fun and fluffy and tasty. My boys were extremely excited to see a box full of candy, no matter the kind. This is what Peeps & Company® sent us:

20140127_152049Peeps chocolate dipped strawberry crème flavored chicks // Peeps chocolate mousse flavored marshmallow bears // Peeps marshmallow hearts // Peeps chocolate covered raspberry flavored hearts // Peeps strawberry crème flavored marshmallow hearts // Peeps vanilla crème flavored marshmallow hearts // Peeps sugar-free marshmallow hearts

And a few fun facts to go along them (click on the pictures to enlarge):

peeps1  peeps2

Because the boys were SO excited about the Peeps, they got to pick out one treat to eat the day we got it. They picked the chocolate dipped strawberry crème flavored chicks and they were a hit! I’ll admit, the strawberry crème flavor was good and the chocolate on the bottom was really good :

20140127_185220 

My personal favorite in the bunch was the vanilla crème hearts. I’m a pushover when it comes to vanilla (not as much with chocolate) so these won my heart. I did like the chocolate covered raspberry hearts too (dark chocolate, that’s my chocolate weakness!). My boys didn’t care what flavor or shape they got, as long as they got a treat! Grant’s favorite was the strawberry crème Peeps, heart or chick shape. All in all, they have some great flavors and the bears were a fun way to mix up the obvious & original shapes of the chicks and hearts, along with the mousse chocolate flavor.

Although these are a fun treat to eat on their own, sparingly, I wanted to do something more with them. Something that could be done for Valentines day, or any day for that matter, to say “I love you.” I looked online to see what other fun projects have been made using Valentine Peeps and these are the favorites that I found:

image1. Peeps Bouquet // 2. “I need s’more friends like you” // 3. “Owl love you forever” // 4. Peeps pops // 5. Peeps wreath //
6. “You are one of my favorite peeps” // 7. “Happy Valentines day to all my peeps” //

I decided to make the Peeps pops and had the boys help. Call it a Valentines preschool activity! They had a blast dipping/painting the “suckers” in the chocolate & decorating them. I forgot about the sprinkles, but they would have loved that too.

IMG_4864

My contribution to the Peeps pop stockpile. I didn’t dare try making them like I saw here & here, I wasn’t really up for a “pinterest fail”!

IMG_4860

I decided to make this into a fun, sneaky service project for our boys (and had to share the sugar with other people besides my family!), so I had little G help me with another project. He cut out lots of hearts & stuck them on skewers.

IMG_4875 IMG_4870

With the paper hearts & the Peeps pops, we went to our neighbor friends and, as quietly as we could, “heart attacked” their front yard! I thought we had a lot more hearts than we did, so the yard wasn’t as covered in hearts as I planned, but it was fun for the boys to attack the yard with the hearts. I’m sure our friends were watching us the whole time, but I don’t care. They boys loved surprising their friends with lots of hearts and candy in the snow! We’ll see if they keep the secret ;)

IMG_4881

IMG_4877IMG_4878IMG_4883  IMG_4884

It was a fun way to get into the Valentines spirit and a great way to use the Peeps!

================================================================================

image
If you’re here just for the giveaway, then this is where you want to be. Peeps & Company®generously sent us a lot of products, so we are here to share the love!
If you are interested, you can enter to win a Valentines Peeps prize pack, which includes one package of each of the following treats:

imagePeeps chocolate dipped strawberry crème flavored chicks // Peeps chocolate mousse flavored marshmallow bears // Peeps marshmallow hearts // Peeps [dark & milk] chocolate covered raspberry flavored hearts // Peeps strawberry crème flavored marshmallow hearts // Peeps vanilla crème flavored marshmallow hearts // Peeps sugar-free marshmallow hearts

These Valentine Peeps make for great valentines, great treats & a great way to tell someone you love them! The flavors are awesome, but you really should try them for yourself. Here’s how you enter to win the prize pack above --

a Rafflecopter giveaway

**giveaway open to U.S. residents only**

*We received the products free of charge from Peeps & Company®. We were not compensated
in any way to write this post or giveaway. All thoughts & opinions are our own.

diy with kiley

January 18, 2014

‘Show Love’ – wedding gift

My littlest brother got married not too long ago and I decided to make them something custom and really personalized. I’m a huge fan of personalized décor, so why not force it on everyone else, particularly my family ;)

IMG_4372

I made this same sort of sign for my bedroom and just copied it for my bro & new sister-in-law, but of course I used their picture instead of ours!

DSCF2836

My previous post about this “Show Love” quote goes into more detail about why I really like this William Shakespeare quote. I know everyone has their own thoughts & opinions about W.S., so maybe my brother thought it was weird when I handed it to him and he read it for the first time (I could tell by the look on his confused face). But as his older sister, I know better and he WILL like it (enter wicked step-sister laugh).

The sign in my room is just vinyl directly on the wall. We own our house and I know we will be here for a while yet. My brother, on the other hand, is still in college and will be moving many {many, many, and many more} times, I’m sure. I did. I didn’t know how to stay put when I was a college student. I was in a new place every year I went back after summer. Heck, I didn’t even stay at the same school longer than 2 years.

I digress.

I used some wood that Grant milled and went through the process of creating their picture. I used Power Point & Silhouette studio for this process. I took one of their engagement pictures, edited it down (like my other post describes in more detail) and traced their figures. It took a while, but it didn’t take as long as weeding!

imageimage

I cut it out in vinyl to use as a stencil, so I had to weed all the little pieces of their picture (which was a P.A.I.N.). Then I placed in on the nicely sanded & routered board, stained it and finished it with a clear coat.

IMG_4371

I love using stain on natural wood because you can still see the grain through it. I’m a huge fan of natural wood. I grew up working on projects with my dad in the garage and shop, so natural wood will always remind me of him. Stain on the wood usually makes the grain pop, which is another favorite of mine.

Someday my brother will appreciate this (if he doesn’t already).

IMG_4370

diy with kiley