June 10, 2013

Fireplace transformation

One weekend, the boys and I went to visit my sister and her family, leaving Grant behind to get some of his work done. When we came back, we found this:

IMG_1353

And just to make this seem even more impressive (like it was) you can watch the transformation.

 
I love surprises and this was an awesome one. I think the boys and I need to leave more often Winking smile
 

diy with kiley

June 3, 2013

Barn Wood sign

We purchased 6 acres of land not to far from our home and there is a lot of work to be done. Our first project is tearing down a really old {nasty} barn that homeless people were using as a hotel and dump. That land got pretty abused up until now, but we are working to make it awesome. So, like I said first we are working on getting rid of that barn. And what comes with a really old barn? Awesome barn wood!! And lots of it :)

DSCF3527

This is the barn. It’s not super big, but it is going to be a lot of work. We have only pulled off the tin around the outside of part of it, cleaned up some garbage and wire around it, and pulled part of the fence down.

downsized_0601131018

I took home a few pieces of the old wood to see what my creative genes could come up with. I debated sanding it or not, but in the end I went ahead and sanded. It took some of the ‘barn wood’ look away, but it also brought out a really neat grain and character.

0601131420b

IMG_1174

so much character!

IMG_1179

It was a little bit longer than I wanted it, but I didn’t want to just cut it with the miter saw because it wouldn’t look authentic at all. So Grant pulled out the axe and tried chopping it to make it look more of a rustic looking cut.

IMG_1183

Well, it totally backfired and the wood was shattered and was ruined. Project FAIL.

IMG_1185

But I did salvage a small portion for a little sign on my front porch. I got the post idea HERE and I couldn’t do just a regular old WELCOME sign. I’m a very anti “everybody’s doing it” type of a person. This initials-in-the-tree idea came to me while I was running earlier that day. [side note: running is the best!]. I used a wood stain to make the heart and initials, but it kind of just looks like a sharpie, then sprayed it with a lacquer. Maybe I’ll have to make some adjustments with the initials and heart and either wood burn it or hand carve it like you are suppose to on tree trunks ;)

DSCF3526

I have another project coming along for more of that barn wood. We’ll see if it actually turns out though!  What other projects would old weathered barn wood be perfect for? Give me some ideas!!

diy with kiley

May 29, 2013

Upcycled Log Planter

I got the idea for this log planter from a random HGTV show that I watched years ago. It was a really easy project and took less than an hour to make. I’m sure I did it the hard way too!!

IMG_1136

Surprisingly this log was not cut by Grant! Instead we got it from an empty lot that just cut down a bunch of trees so they can start building. Grant was given permission and already took the majority of the larger, longer logs, but I wanted a smaller one for this project.

IMG_1122

I used a spade bit and drilled some holes pretty close together and fairly deep.

IMG_1123

Then I used the hammer and chisel to get more of the guts out and smooth out the edges. I finished it by using the drill again and basically used it like a mixer to make the hole bigger and deeper.

IMG_1124

I put a little dirt in it and then a couple free flowers we got from a local nursery. Pretty easy and super fast. I’m not the best green thumb out there, but hopefully they will actually keep growing and bloom! Now I want at least one more, but in a bigger log right next to this one by my front door.

IMG_1134


IMG_1125


Tools needed:  

*Drill
*Spade bit
*Hammer
*Chisel


**update** Grant came home from work and made the second one!
IMG_1144 IMG_1143

diy with kiley

May 27, 2013

Low maintenance flower bed

We did a little bit of yard work the other day. It’s definitely not one of our favorite activities, but we did it. What we worked on was the flower bed in front of our house. Something needed to be done because it was just growing weeds and turned into the boys dirt box to dig and play in.

First step, fill it with more dirt - FREE. Luckily we have some land not too far away, as skid steer and a truck, and we were able to get a scoop of dirt no problem.

Next, lay down some plastic. Normally you would use landscaping fabric for this part, but what’s the point of paying twice as much for “landscaping” stuff when you can buy “painters” stuff to do the same job.

IMG_1104

Grant found this plastic in the paint section at Home Depot. A HUGE roll for only $10. We used about 10 feet of it, maybe. So now we have more for our next project, if there is one (or just a huge slip’n’slide!!).

IMG_1108

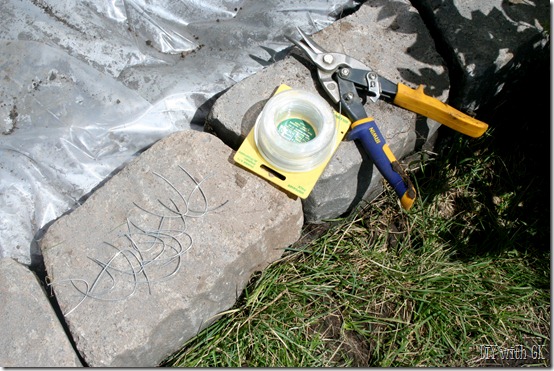
Grant was awesome and made sure the plastic was tucked into every nook and cranny. There will be NO weeds growing in this bed! To make it stay in place we used the landscaping rocks in the front, and some homemade staples in the back – wire, cut and bent.
IMG_1106

There is no way anything is going to grown or even try to sneak up past that!

IMG_1109

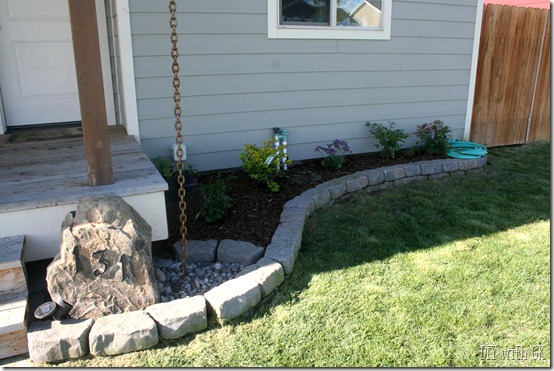
Last step, cut holes for the plants (we had 5 different shrubs), plant them and top with some mulch/bark.
IMG_1118

We are absolutely NOT green thumbs. We have no idea what we are doing, nor do we really enjoy it as much as other things. It’s pretty much been last on our list for a while (years). But I will admit our front yard looks SOOOO much nicer now that we finished the flower bed (is that even what it’s called, it doesn’t have flowers in it, just shrubs?!). The best part, SUPER LOW MAINTENANCE (no weed pulling, EVER!).

diy with gk


FEATURED ON:

realfamilyfun